
How to create a .csv - TIPS
Article by: Suzana-Gabriela Lupu
TIPS FOR WS
1. You can download an empty CSV file from here
2. Please, be sure you start to fill the CSV with the A1 cell.

Figure 1
3. Copy and paste the values corresponding to columns from the customer’s CSV file.
4. For columns like
weight, price don’t add the units or currency symbols on every product row. Instead of it, you could add the units or currency symbols on the column’s name
(see figure 2).
The “Number format” of these cells should be “General”
(see figure 3).
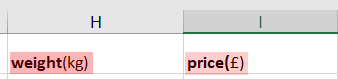
Figure 2
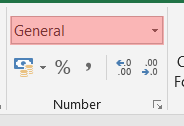
Figure 3
5. “Category” columns – There are 3 columns of “Category” (“category1”, “category2”, “category3”).
Please, fill just “category1” if you want your product to exist only in one category.
a. Fill “category1” with the name of category and sub-categories of your products. (e.g. In the picture 4,
Toiletries
is the main category,
Cloth Nappie is a subcategory of Toiletries,
Baby Bare Uk is a subcategory of Cloth Nappie).
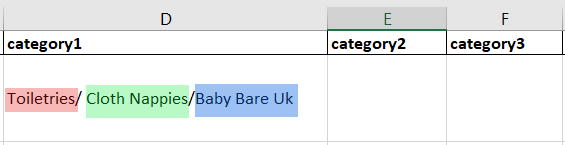
Figure 4
b. If you want a product to exits in different categories, you could fill also the columns “category2” and “category3”.
So, in the example below the product “Frogger Cloth Nappy” will be added in the “Toiletries”,
“At Home” and “Travel” categories.

Figure 5
6. Please, is necessary fill in the quantity column correctly. If this column is completed, from the online store could be ordered the maximum value specified in quantity columns. More of our customers set the quantity products to 2 or 3 and then they come back and ask why is not possible to order more of 2 or 3 products.
7. Image column - Exists 2 options to fill this column:
7.1. Specify the image’s name from the “Images” folder uploaded in SharePoint.
7.2. If the customer has the images uploaded in Cloud (Drobox, Google Drive, etc.) the Image column could be filled in with the images’ link from the Cloud. NB: The images from the customer should pe PUBLIC in order to access them. Also, It is important that the images are not deleted until we finish the website build.
8. Last step, delete all empty/unnecessary columns and save it as a .xls file
TIPS FOR BUILDERS
1. You can download an empty CSV file from here
2. Copy and paste the products from the CSV uploaded in the project’s folder.
3. Make sure the first column starts at cell A1 (See image below)
Figure 1
4. Make sure the weight, price, quantity don’t have any symbol.
5. Make sure all these fields Number format is “General” (see image below)
Figure 2
6. If exists, delete the explanatory field (see image below).

Figure 3
7. The most intriguing step… HOW COULD YOU ADD IMAGE URL TO THE CSV???
7.1. Upload all your product images in your Duda’s project.
7.2. In Duda go to CONTENT -> MAGAGE IMAGES -> then select an image.
In the left, the selected image will appear, below you will se the Name of the image underlined. Open it in another tab.
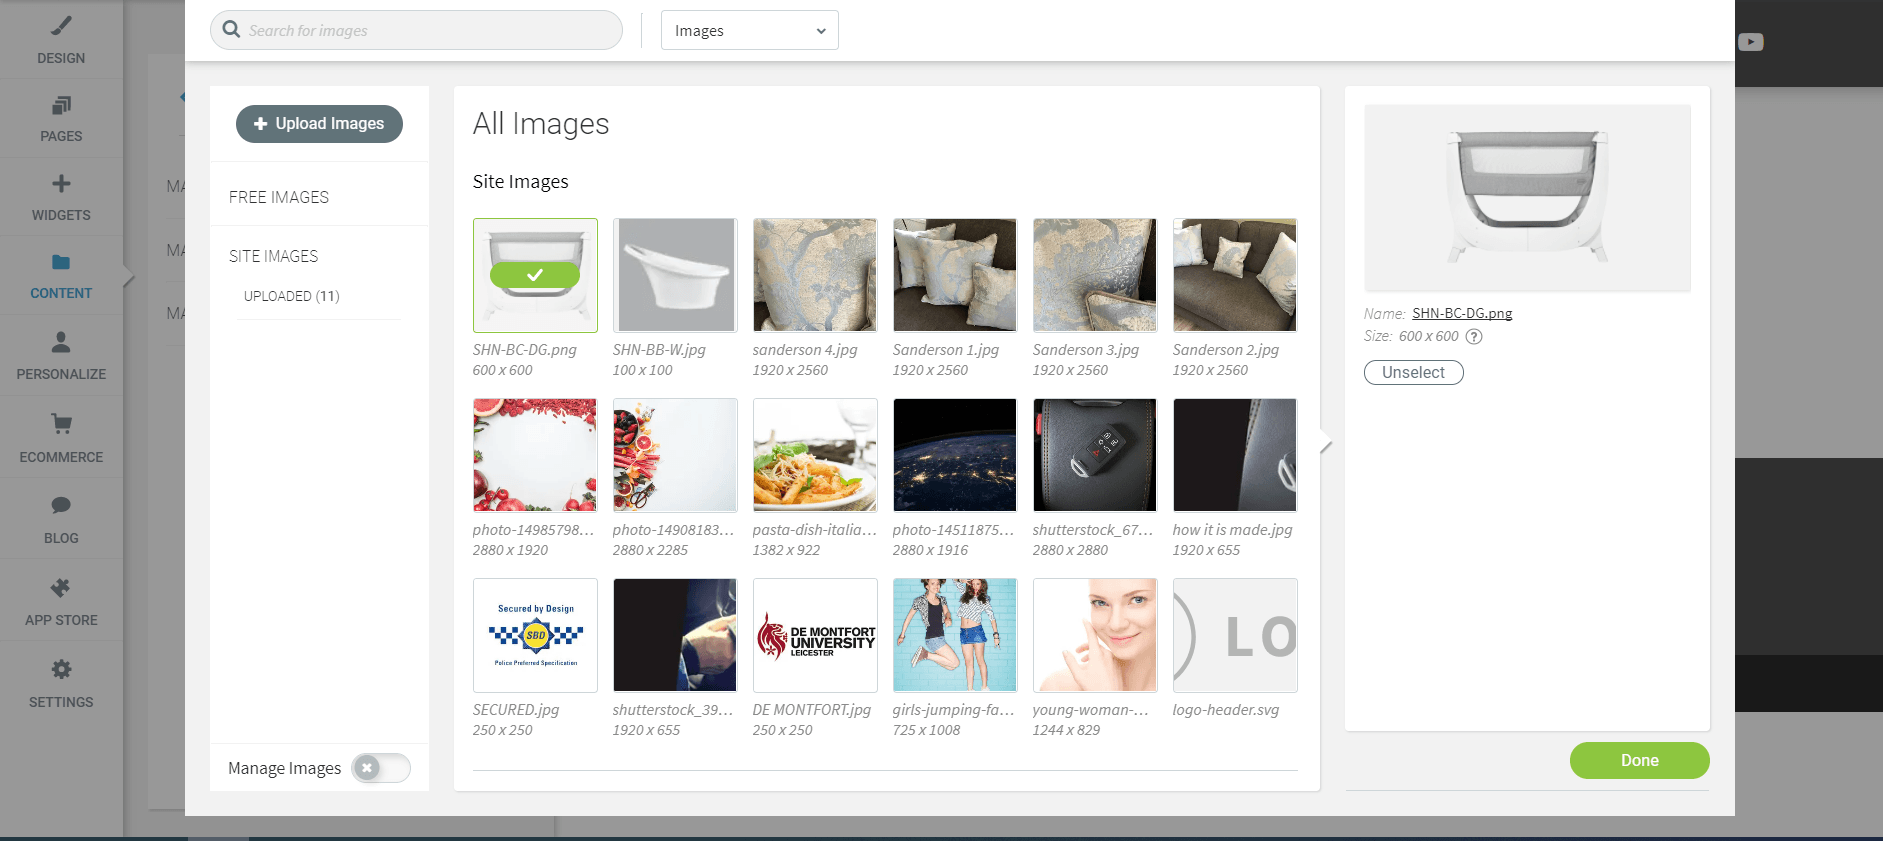
Figure 4
7.3. Now, the image is open in a new tab. Next step is to copy the link without the image’s name. The link you should copy is highlighted in the below image.

Figure 5
7.4. Going back to our EXCEL file, paste your link in a empty cell.
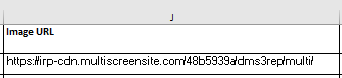
Figure 6
7.5. Next,add/insert a new column with name Image_CONCAT. Then use the for function CONCAT where you should add the IMAGE URL and the image name.

Figure 7
For IMAGE URL (in this case, J2) column, we should press F4 which is a shortcut for placing absolute cell references in our formulas, that means that the link will be the same for all your entries.
7.6. Drag down to fill all the empty IMAGE_CONTACT cells.
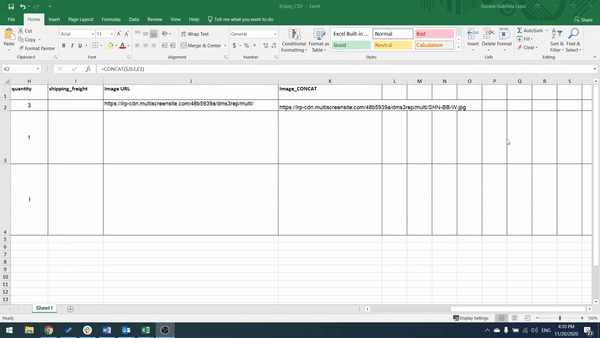
Figure 8
7.7. Copy the entire IMAGE_CONCAT column and “PASTE VALUES” in a new column.
7.8. Last step:
delete all your unnecessary columns (Image, Image URL, Image CONCAT etc.) and NOW you can save your excel file as a
CSV
and import your this on your store.